Laravel is an incredible and mature PHP framework that has sky-rocketed in popularity since its initial introduction back in 2012. Personally, I also think it’s a fantastic choice for web development, and I’d love to show you the ropes if you’re willing! Together, we’ll review each piece of the framework, and wrap up by building a Job Board platform where users can post and apply to job listings. To full disclosure, this tutorial is based on the Laravel tutorial series from Laracasts - a fantastic resource for learning Laravel, PHP and other web technologies. However, I’ve made some adjustments to the original content to better suit the latest version of Laravel and to enhance the overall learning experience.
Tooling #
To follow along with this tutorial, you’ll need to have a few tools installed on your machine:
-
PHP: Laravel is a PHP framework, so you’ll need to have PHP installed. If you are a Windows user, I recommend using XAMPP or Laragon to set up a local development environment. XAMPP includes PHP, Apache, and MySQL, which are all necessary for running Laravel applications. If you’re on macOS or Linux, you can install PHP using Homebrew or your package manager of choice. Then you can run the following command to install the latest version of PHP:
brew install phpIf you are a Linux user, you can use your disto’s package manager to install PHP. For example, on Ubuntu, you can run:
sudo apt-get update
sudo apt-get install php libapache2-mod-php php-mysql
There is also a tool called Laravel Herd that provides a simple way to run Laravel applications on macOS and Windows. It includes PHP, a web server, and a database server, all configured to work with Laravel out of the box, but if you want to get the full power of Laravel Herd, you will need to buy a license. There is a free version, but it has some limitations.
Another site is php.new that provides necessary scripts and guides you through the installation process for your specific operating system.
-
Composer: Laravel uses Composer to manage its dependencies. You can install Composer by following the instructions on the official website.
-
Laravel Installer: While you can create a new Laravel project using Composer, you can also install the Laravel installer for a more streamlined experience. You can install it globally using Composer:
composer global require laravel/installer
-
Code Editor: You’ll need a code editor to write your code. If you are a beginner, I recommend using Visual Studio Code for its powerful features and extensions with official VS Code Laravel extension.
PhpStorm from JetBrains is another great option, especially if you are looking for a more robust IDE with advanced features for PHP development.
Once you have these tools installed, you’re ready to start building your Laravel application!
Versions #
For this tutorial, we’ll be using Laravel 12, which is the latest stable version as of now. Make sure to check the official Laravel documentation for any updates or changes in future versions.
PHP 8.1 or higher is required to run Laravel 12, so ensure that your PHP installation meets this requirement.
Creating a New Laravel Project #
To create a new Laravel project, you can use the Laravel installer or Composer. Here, I’ll show you how to do it using both methods.
Using the Laravel Installer #
If you have the Laravel installer installed globally, you can create a new project by running the following command in your terminal:
laravel new project-name
Using Composer #
If you prefer to use Composer, you can create a new Laravel project by running the following command
composer create-project --prefer-dist laravel/laravel project-name
Replace project-name with your desired project name. This command will also create a new directory and install Laravel.
I recommend using the Laravel installer for its simplicity, speed and it gives you several options to kickstart your project. I’ll explain more about these options below.
Laravel Installer Options #
When you run the laravel new command, it asks you a few questions to customize your project setup:
-
Starter Kit: You can choose a starter kit to include in your project. Starter kits provide pre-built authentication and UI scaffolding using popular front-end frameworks. The options are:
None: No starter kit (default).React: Includes React scaffolding.Vue: Includes Vue.js scaffolding.Livewire: Includes Livewire scaffolding.
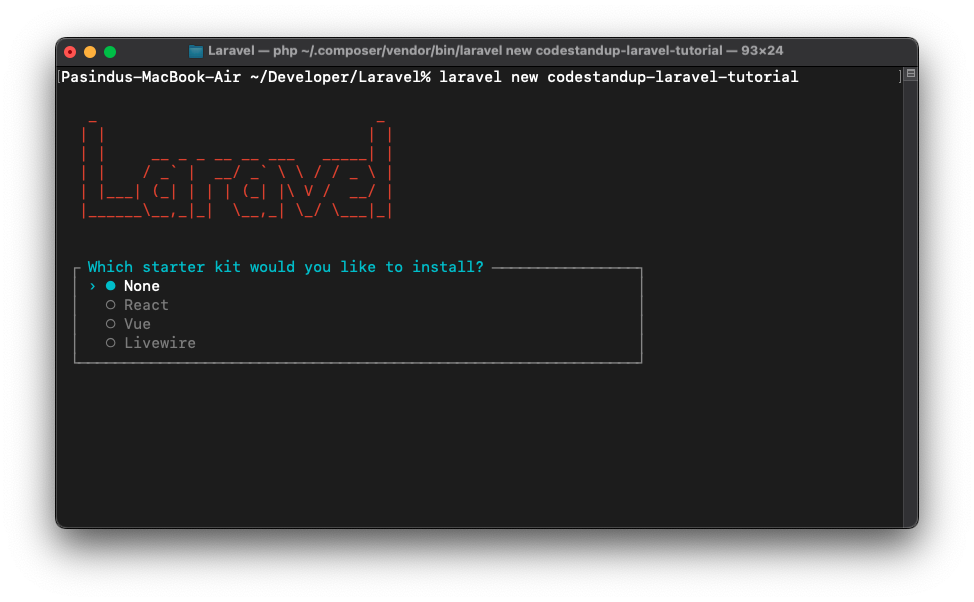
Since this is a beginner tutorial, I recommend choosing
Nonefor now. We will add authentication and UI scaffolding in another tutorial. -
Testing Framework: You can choose a testing framework to use with your project. The options are:
-
Pest: A modern PHP testing framework with a focus on simplicity. More and more developers are adopting Pest for its elegant syntax and ease of use, so it’s becoming kind of a standard in the Laravel community. -
PHPUnit: It’s a bit more verbose than Pest, but it’s also more widely used and has been around for a longer time. Pest is built on top of PHPUnit, so you can use both if you want.After you select a testing framework, the installer will create your new Laravel project and install all the necessary dependencies. This process may take a few minutes, depending on your internet connection and computer speed.
-
-
Database: After the project is created, the installer will ask you to choose a database for your project. The options are:
SQLite: A lightweight, file-based database. It’s great for small projects and development environments.MySQL: A popular relational database management system. It’s widely used in web applicationsMariaDB: A fork of MySQL, known for its performance and open-source nature.PostgreSQL: A powerful, open-source relational database system. It’s known for its advanced features and performance.SQL Server: A relational database management system developed by Microsoft
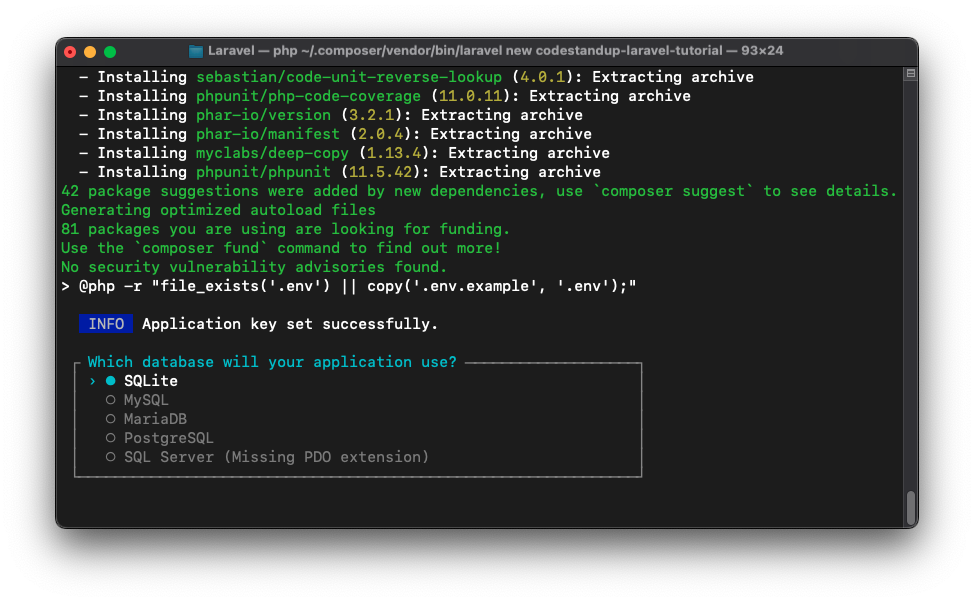
For this tutorial, I recommend choosing
SQLite. It’s easy to set up and doesn’t require any additional configuration. If you choose SQLite, the installer will create a new SQLite database file in thedatabasedirectory of your project.If you choose any other database, you’ll need to configure the database connection in the
.envfile later. We will cover database configuration in another tutorial.
Then the installer will configure more settings for your project, including running migrations (We will cover this in the database tutorial) to set up the database schema.
As the final step, the installer will ask you if you want to install NPM dependencies and compile assets using Vite. Vite is a modern front-end build tool that provides a fast and efficient development experience. It is the default front-end build tool for Laravel 12.
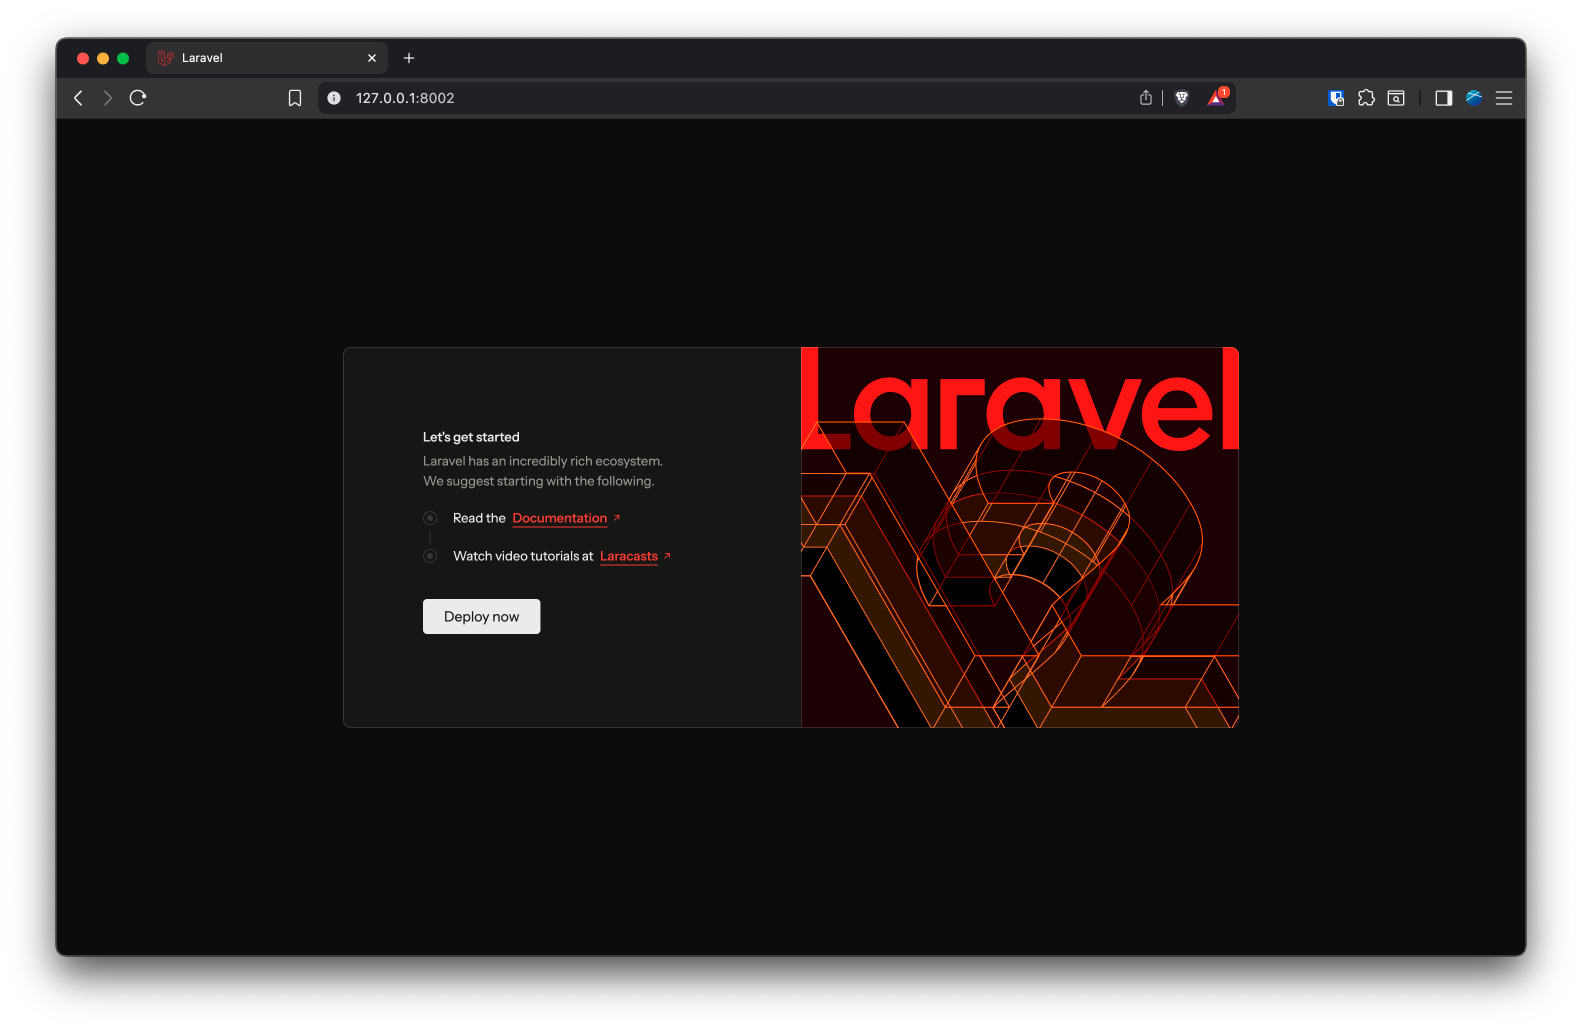
After the project is created, to run your Laravel application, navigate to the project directory and start the development server:
cd project-name
php artisan serve
This command will start a local development server at http://localhost:8000. You can open this URL in your web browser to see your new Laravel application in action!
In the next tutorial, we’ll discuss about Laravel’s directory structure and we’ll create our first route. Stay tuned!