The first time I bought a Mac, I installed software by downloading .dmg files from the internet and dragging applications to the Applications folder or installing them via the App Store. While this method works, it can be cumbersome and time-consuming, especially when managing multiple applications or dependencies. Then I heard about Homebrew, first I was skeptical, but after trying it out, I realized how much easier it made software installation and management on macOS.
What is Homebrew? #
Homebrew is the easiest way to access open source community resources on your Mac.
The open source community handles software distribution in a completely different way. Many projects are open to the public on the internet, allowing everyone to use, participate and contribute. These projects usually focus on a single purpose, such as HTTP GET/POST handling, and are packaged with programmatically callable APIs so that other people can embed them into their code. We call such software “libraries” or “packages”.
Now try to think as a coder. If you’re building something, like a web browser, and you don’t want to code everything from scratch, what will you do? You’ll install libraries on your computer, like the one that handles HTTP GET/POST, so you can write codes to combine them together.
The issue is that you need to download and install these libraries on your computer, but they may require a different set of libraries to be installed first. Each library will have a list of needed libraries, so you’ll need to download and install them one by one. It’s tedious and takes a lot of efforts, so this is called “dependency hell”.
Imagine that one component in this installation chain needs to be updated. You’ll have to update that component and all the components that depend on it, which surely is a nightmare.
Homebrew is a tool specifically designed for such tasks. It can automatically download and keep all necessary projects up-to-date in a single command. And that’s why is a priceless treasure for coders.
Homebrew Formulae vs. Casks #
Homebrew uses two main types of packages: Formulae and Casks.
- Formulae are used for command-line tools and libraries. They are typically installed in
/usr/local/Cellarand linked to/usr/local/bin, making them accessible from the terminal. - Casks are used for macOS applications and large binaries. They are installed in the
/Applicationsfolder or~/Applications, making them accessible like any other macOS app.
Installing Homebrew #
Before you install Homebrew, you need to have the Xcode Command Line Tools installed on your Mac. It’s a prerequisite for Homebrew as it provides essential tools like git and make.
To install the Xcode Command Line Tools, open your Terminal and run the following command:
xcode-select --installYou will be prompted to install the tools and agree to the license agreement. Follow the on-screen instructions to complete the installation.
After installing that, you can install Homebrew by running the following command:
/bin/bash -c "$(curl -fsSL https://raw.githubusercontent.com/Homebrew/install/HEAD/install.sh)"Let’s break down what this command does:
/bin/bash -ctells your system to run the following command in a new Bash shell.$(...)is a command substitution that runs the command inside the parentheses and uses its output as input for the outer command.- The command inside the parentheses uses
curlto fetch the Homebrew installation script from its official GitHub repository. - The
-fflag tellscurlto fail silently on server errors, without outputting and HTML error page. - The
-sflag makescurloperate in silent mode, suppressing progress bars. - The
-Sflag makescurlshow an error message if it fails. - The
-Lflag tellscurlto follow any redirects, ensuring it reaches the correct URL.
This command downloads and executes the Homebrew installation script, which sets up Homebrew on your system.
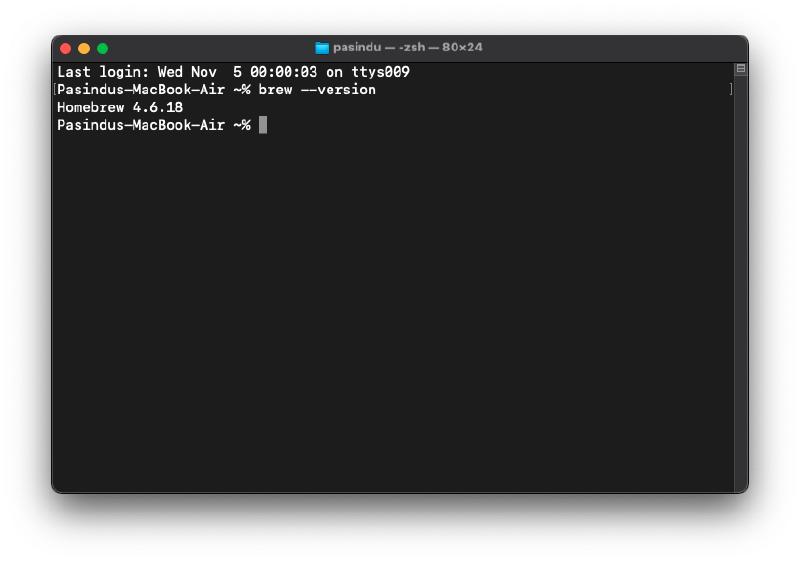
To check if Homebrew is installed correctly on your Mac, you can run:
brew --versionIf Homebrew is installed correctly, you should see the version number displayed in the terminal like below,
Using Homebrew #
Searching for Formulaes #
You can search for formulaes using the brew search command. For example, to search for PHP, you would run:
brew search phpThis command will return a list of available PHP versions and related packages.

As you can see, there are multiple versions of PHP and related packages available for installation. The installed packages are marked with a green checkmark.
If the searched name is matched with an existing cask, it will be listed under the “Casks” section.
You can also use the homebrew website to search for formulaes and casks: https://formulae.brew.sh/
Installing Formulaes #
To install a formula, you can use the brew install command followed by the formula name. For example, to install PHP, you would run:
brew install phpThis command will download and install the latest version of PHP along with any dependencies it requires.
Searching for Casks #
You can search for casks using the brew search --cask command. For example, to search for Google Chrome, you would run:
brew search --cask google-chromeThis command will return a list of available casks related to Google Chrome.
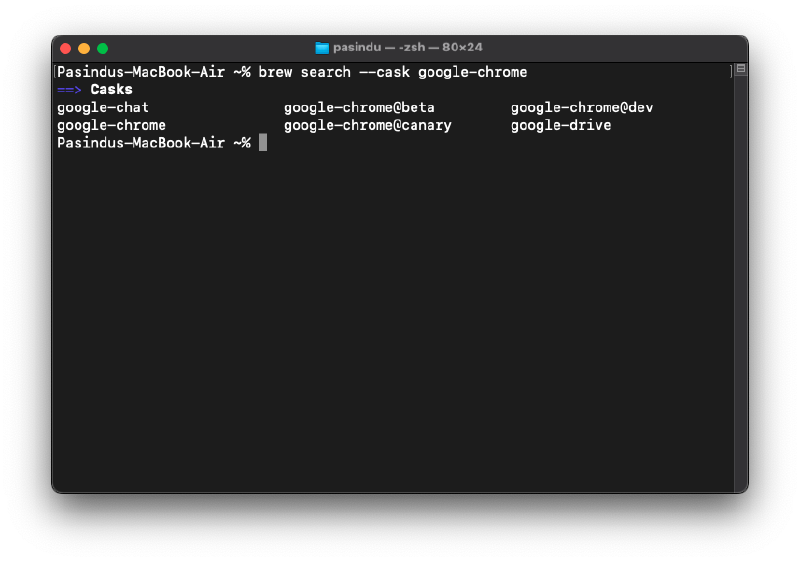
You can see the full list of casks on the Homebrew website: formulae.brew.sh/cask. If you run below command, you can get the count of available casks.
brew search --casks "" | wc -lAs of writing this article, there are over 7,000 casks available.
Installing Casks #
To install a cask, you can use the brew install --cask command followed by the cask name. For example, to install Google Chrome, you would run:
brew install --cask google-chromeThis command will download and install Google Chrome in your Applications folder.
Uninstalling Formulaes and Casks #
To uninstall a formula, you can use the brew uninstall command followed by the formula name. For example, to uninstall PHP, you would run:
brew uninstall phpTo uninstall a cask, you can use the brew uninstall --cask command followed by the cask name. For example, to uninstall Google Chrome, you would run:
brew uninstall --cask google-chromeListing Installed Packages #
To list all installed formulaes, you can run:
brew listThis command will display a list of all formulaes currently installed on your system.
To list all installed casks, you can run:
brew list --caskThis command will display a list of all casks currently installed on your system.
See outdated Packages #
To see which installed packages are outdated, you can run:
brew outdatedAfter running this command, you will see a list of packages that have newer versions available.
Updating Homebrew and Packages #
To update Homebrew itself, you can run:
brew updateThis command fetches the latest version of Homebrew and all formulae definitions.
To upgrade all installed packages to their latest versions, you can run:
brew upgradeThis command will upgrade all outdated packages installed via Homebrew. If you want to upgrade a specific package, you can specify its name:
brew upgrade phpCleaning Up #
Homebrew keeps a cache of downloaded files and old versions of packages. You can clean up this cache and remove old versions, but before doing that, you can see how much disk space you can free up by running:
brew cleanup -nThis command will show you a list of files and directories that would be removed without actually deleting them and the total disk space that can be freed.

To actually perform the cleanup and free up disk space, you can run:
brew cleanupManaging Services with Homebrew #
Homebrew also provides a way to manage background services using the brew services command. This is particularly useful for starting, stopping, and restarting services that are installed via Homebrew. This feature is built on top of macOS’s launchd system.
Starting a Service #
To start a service, you can use the brew services start command followed by the formula name. For example, to start the MySQL service, you would run:
brew services start mysqlStopping a Service #
To stop a service, you can use the brew services stop command followed by the formula name. For example, to stop the MySQL service, you would run:
brew services stop mysqlListing Services #
To list all services managed by Homebrew, you can run:
brew services listThis command will display a list of all services, their status (started, stopped, or error), and the user they are running under.
Third Party Taps #
Homebrew allows you to add third-party repositories, known as “taps,” to access additional formulaes and casks that are not available in the default Homebrew repository. You can add a tap using the brew tap command followed by the repository name. For example, to add the homebrew/cask-versions tap, which contains alternate versions of casks, you would run:
brew tap sass/sassYou can then search for and install formulaes and casks from the tapped repository just like you would with the default Homebrew repository.
Using Brewfile for Managing Dependencies #
If you are switching to a new Mac or want to share your development environment setup with others, you can use a Brewfile to manage your Homebrew dependencies. A Brewfile is a simple text file that lists all the formulaes and casks you want to install. This allows you to easily recreate your setup on another machine by running a single command.
Creating a Brewfile #
Navigate to a preferred directory and create a Brewfile using the following command:
brew bundle dumpThis command generates a Brewfile in the current directory, listing all the installed formulaes and casks on your system. It will look something like this:
tap "dart-lang/dart"
tap "sass/sass"
tap "shivammathur/php"
brew "php", link: false
brew "composer"
brew "hugo"
brew "nvm"
brew "uv"
brew "sass/sass/sass"
brew "shivammathur/php/[email protected]", link: true
cask "alt-tab"
cask "iina"
cask "mos"
cask "obs"
cask "qbittorrent"
cask "zoom"
vscode "dracula-theme.theme-dracula"
vscode "dsznajder.es7-react-js-snippets"
vscode "esbenp.prettier-vscode"
vscode "github.copilot"
vscode "github.copilot-chat"
Installing using a Brewfile #
To install all the formulaes and casks listed in your Brewfile, place the Brewfile in your home directory and run the following command:
brew bundle installThis command reads the Brewfile and installs the missing formulaes and casks, ignoring those that are already installed. This makes the process repeatable and efficient.