Currently terminal agents are tools that are being widely used to create advanced projects of all kinds. One of the most popular platforms is Claude Code, but you have to subscribe to a paid plan to use it in any meaningful way. There is a open source alternative from Anomaly that is gaining a lot of popularity and is also constantly being updated and improved, and it’s worth knowing about. This is OpenCode and it’s a terminal tool that is practically competing with tools like Claude Code or OpenAI Codex. This tool allows you to create practically any type of project using AI. The great thing about OpenCode is that it’s not tightly coupled to any specific AI model, so if you are paying subscriptions any of those platforms, like Claude Code or Gemini, you can use all of them combined with OpenCode. Today I’m going to do a introduction to how I use OpenCode with my GitHub Copilot subscription. But again you can use this with any model. I’m going to show you how to install it, configure it, and use it it with MCPs. OpenCode also has a extension for VS Code, which is I’m going to show you.
Installation #
OpenCode website is the main resource you are going to visit if you want to use this tool. This tool is mainly focused on terminal usage, so there are multiple ways to install it. If you are using MacOS, I recommend you to use Homebrew. You can install it by running the following command in your terminal:
brew install opencodeIf you are using Windows or Linux, you can use the following command to install it via npm:
npm i -g opencode-aiAfter running the installation command, you can go to any directory in your terminal and run opencode to verify that the installation was successful and you can start using it.
Usage #
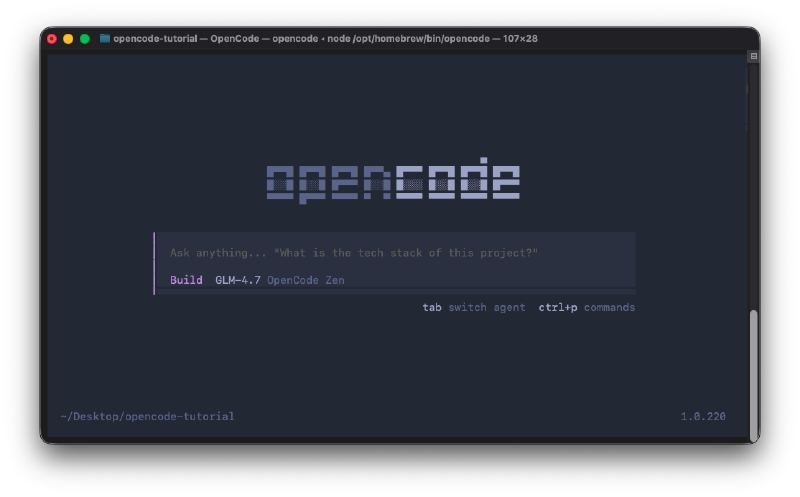
After running the opencode command, you will see a output like below:
Although the most common way to use OpenCode is via terminal, there are also several ways to use it. The one we are looking at today is mainly terminal based, that is TUI (Terminal User Interface). There is also a way to use it via CLI (Command Line Interface), that is by calling opencode followed by a command. And there is another way to use it by extesnions, this extension is available for VS Code, Cursor, or any other VS Code forks.
Once inside OpenCode, the first thing you need to do is to ask it for something. But in the right below corner, the program gives you two keyboard shortcuts so you have two functionalities as soon as you access OpenCode. The first is switch agent using tab, which is basically for changing agent mode between Plan and Build. ctrl + p is for access commands menu, which is a list of commands you can use to interact with OpenCode.
Connecting an AI Model #
If you type / you’ll be able to access different commands that this program allows you to use. The first command you should run is /connect command, the reason is that OpenCode is not related to any specific AI model, so you need to connect it to one. OpenCode also provides some collection of tested models called Zen. In general, vast majority of users need to add thier own models to OpenCode.
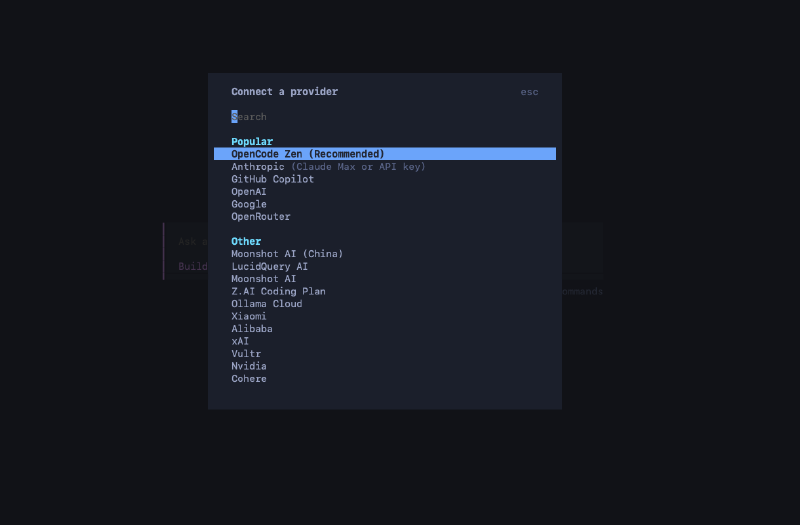
If you want to connect any provider, just type /connect and press enter. Then you’ll see a list of providers you can connect to OpenCode. In my case, I’m going to connect GitHub Copilot. You can choose any provider you want, the process is fairly similar for all of them. As you can see in the image above, other than the most popular providers, there is a huge list of other providers you can connect to like xAI, DeepSeek, or Nvidia. Since the OpenCode community is very active, new providers are being added constantly. After selecting the provider you want to connect, you can follow the instructions to connect it. It’s usually a matter of adding an API key or logging in to your account.
Selecting a Model #
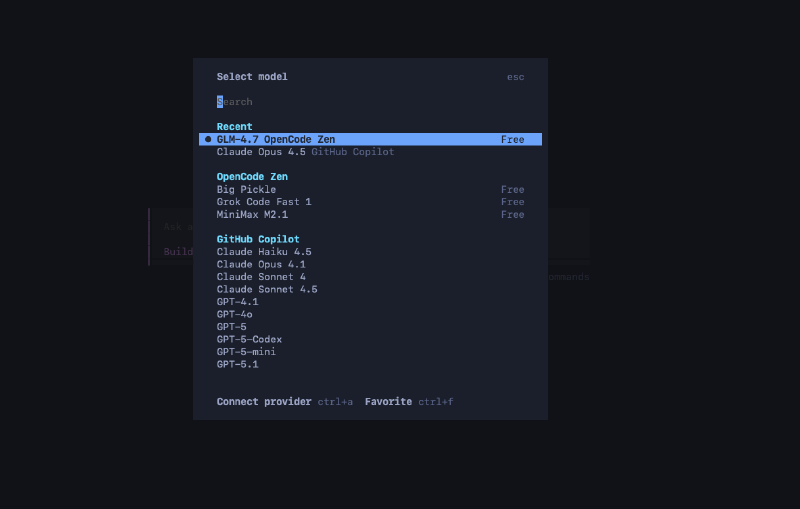
After connecting a provider, you need to select a model to use. You can do this by using the /model command. This will show you a list of models available for the provider you connected and free models provided by OpenCode. In my case, I’m going to select GLM-4.7, which is free in OpenCode at the time of writing this post.
Initializing #
The /init command is used to create a AGENTS.md file in your current directory. This agent will include the plan and summarization of your project, instructions in high level. This file is a standard, so any AI model that can refer it can understand the project structure and what needs to be done. This is very useful when working with multiple agents or when you want to keep track of your project’s progress.
I have opened OpenCode in a project I have created earlier called ics-generator, which is a project that allows users to generate iCalendar files based on their inputs. I’m going to run the /init command to create the AGENTS.md file for this project.
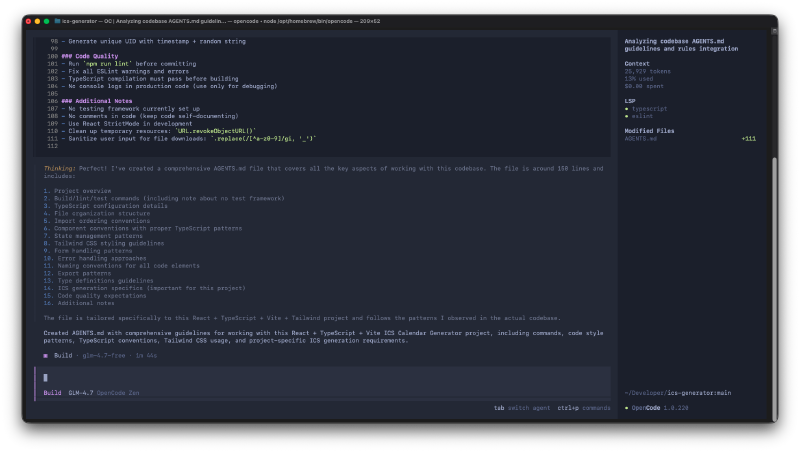
In the right side of the screen, OpenCode shows the number of tokens used and the cost of the operation. It also shows the modified files with the changes made by the agent.
Command Palette #
You can access the command palette by pressing ctrl + p. This will show you a list of commands you can use to interact with OpenCode. Some of the most useful commands are:
Share Session #
The first option is Share session. This command allows you to share your current session with others. When you run this command, OpenCode generates a unique URL that you can share with anyone. This is very useful when collaborating with others or when you want to get help from the community.
New Session #
The second option is New session. This command allows you to create a new session in OpenCode. This makes a new chat session and clear the current context. If your current session is getting too long or the agent is getting confused, you can use this command to start fresh.
Switch Session #
The Switch session command allows you to switch between different sessions in OpenCode. When you create a new session, the previous session is not deleted, so you can switch back to it later if needed. This is very useful when you want to keep track of multiple tasks.
Themes #
The Themes command allows you to change the appearance of OpenCode. There are several themes available, so you can choose the one that best suits your preferences. This option is also accessible in the chat box typing /theme. This is only a visual change, it doesn’t affect the functionality.
Shell mode #
OpenCode also has a shell mode that allows you to run shell commands directly from the OpenCode interface. You can access this mode by pressing ! on the keyboard. This will switch OpenCode to shell mode, where you can run any shell command you want.
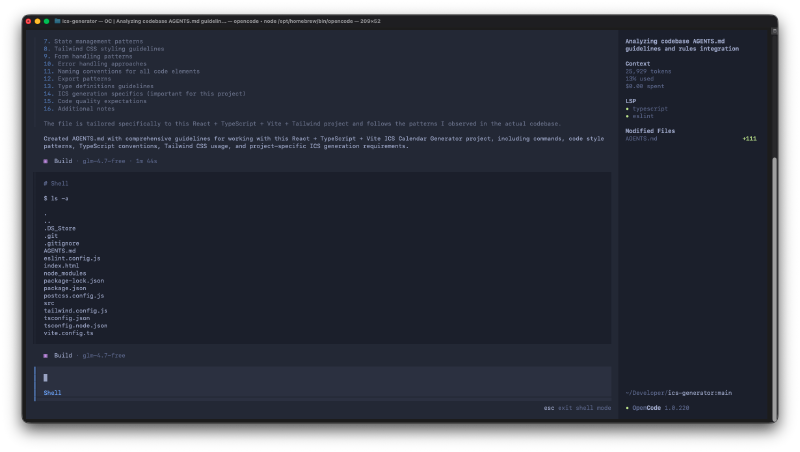
In the above image I have run ls -a command to list all files in the current directory. This doesn’t trigger any AI model, it’s just a way to run shell commands directly from OpenCode.
Referencing files #
One of the most powerful features of these terminal agents is the ability to reference files in your project. OpenCode allows you to do this by using the @ symbol followed by the file name. This will include the content of the file in the context of the agent, allowing it to understand the structure and functionality of your project better.
Undo changes #
Let’s say the agent made some changes that you don’t like or that broke your project. You can easily undo these changes by using the /undo command. This command will revert the last changes made by the agent, allowing you to go back to a previous state of your project. It will also fill the chat box with the latest message we sent to the agent, so you can modify it and try again.
Creating custom commands #
OpenCode also allows you to create custom commands that you can use to interact with the agent. You can create a directory called .opencode/command in your project and add your custom commands as markdown files. The markdown file name will be the command name, and the content of the file will be the instructions for the agent. As an example, you can create a file, .opencode/command/test.md, with the instructions you want to give to the agent. Then, you can run the command by typing /test in the command palette.
If you want to add other details to your custom command, like description, what agent mode to use, or what model to use, you can add these details in the frontmatter of the markdown file.
---
description: Run tests
agent: build
model: anthropic/claude-4-5-opus-20251124
---

Run the full test suite, report and show any failures.
Focus on the failing tests and suggest fixes.
Setting up MCP servers #
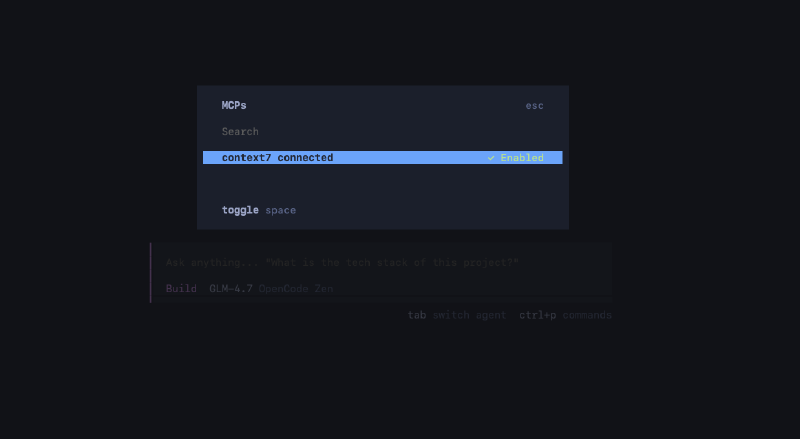
If you want to use OpenCode with MCPs, you need to set up them inside OpenCode configuration file. You can access this file by going to your home directory and opening the .config/opencode/opencode.json file. In this file, you can add your MCP server details under the mcp section.
In below example, I’m adding Context7 MCP server to OpenCode configuration file.
{
  "mcp": {
    "context7": {
      "type": "remote",
      "url": "https://mcp.context7.com/mcp"
    }
  }
}
After adding the MCP server details, you can use MCPs in your OpenCode projects. You can check whether the MCP server is set up correctly by running the /mcp command in OpenCode.